
Configuring a Smart Card Reader in a VirtualBox Windows 10 VM
Smart cards and smart card readers generally work fine in Mac OS when used with a web browser, but they can be a bit challenging to use to digitally sign a document, such as a PDF. In these cases, I find it easier to use a Windows virtual machine for digital signing. I prefer the open source software VirtualBox to run VMs on my Mac. While outside the scope of this post, plenty of information exists to help with the process of installing a Windows 10 VM in VirtualBox.
In an out-of-the-box Windows 10 VM, attempting to digitally sign a document such as a PDF will likely result in a prompt from your PDF reader asking you to manage/configure your certificates, such as the one below from Adobe Reader:
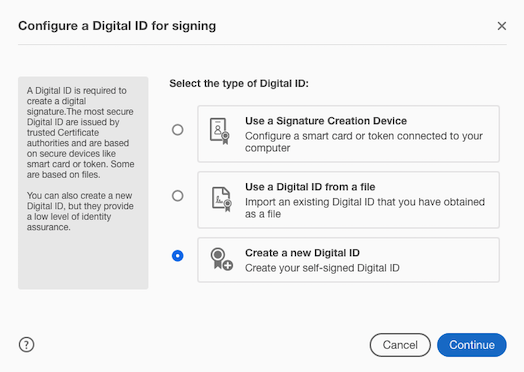
This prompt means the certificates on the smart card are not being recognized by the system. If they were, a dialog would appear displaying the available certificates. The light on the smart card reader (if it has one) will also be off instead of lighting up as the system reads the card.
The following steps describe how to configure a VirtualBox Windows 10 VM to use a smart card reader:
- Power off the VM
- Ensure the smart card reader is plugged in
- Go to Settings for the VM in VirtualBox
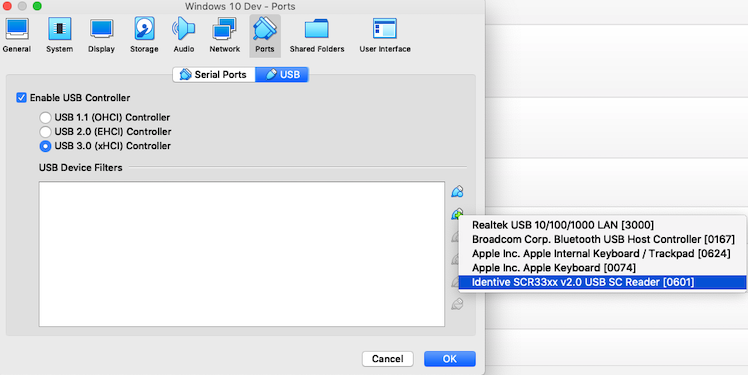
- In the Settings dialog, go to Ports, then USB
- Ensure the “Enable USB Controller” box is checked
- Click the USB icon with the plus (+) icon on the right-hand side of the “USB Device Filters” box
- A list of attached devices will appear
- Select the smart card reader from the list
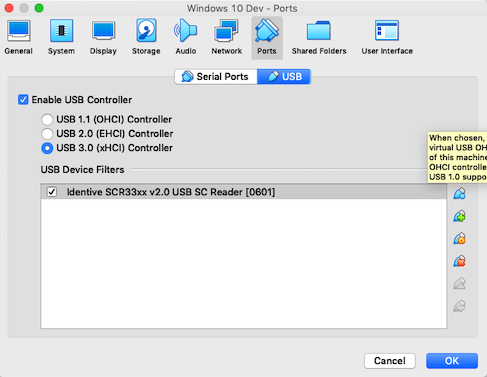
- The default configuration should be fine
- Choose OK, and the card reader will added to the list of USB device filters
- Close Settings
- Start the VM
- Go to the Windows Device Manager
- Device Manager should have entries for “Smart card readers” and “Smart cards”
- The smart card reader should NOT BE listed under “Universal Serial Bus controllers”
- Expand the “Smart card readers” node
- Right-click on the node
- Choose “update driver” from the context menu
- Follow the steps in the dialog that appears to update the driver(s)
- Once the update is complete, the smart card reader make/model should be listed instead of a generic entry
- Repeat the previous steps for the entry under the “Smart cards” node
Re-open the document and digitally sign it. The PDF reader should display the certificates found on the smart card. Choose the appropriate certificate, and the system should prompt you to enter the smart card PIN. You will also be prompted to save the document as a new document.
Close the original document and open the newly-created document to confirm that it is indeed digitally signed.